Old Furniture, New Life: Upcycling for Fun & Function
Old furniture has a charm and character that modern flat-pack pieces often lack. With a little effort and creativity, those tired tables, worn chairs, or dated dressers can be transformed into standout pieces full of personality. We look at how and where to find old furniture and ways to upcycle them for fun and function.
Upcycling isn’t just a money-saving hobby—it’s a way to add custom style to your space, reduce waste, and enjoy the satisfaction of doing it yourself. From simple paint jobs to clever repurposing, this guide offers practical tips on finding secondhand treasures and turning them into functional, beautiful pieces for your home.

Where to Find Old Furniture Worth Upcycling
Great pieces can be found just about anywhere, especially if you know where to look. Facebook Marketplace is a goldmine for local listings, often with prices you can negotiate or even snag for free. Craigslist and OfferUp are also worth browsing—look under “free” or “curb alert” for potential upcycles. Thrift stores like Goodwill, the Salvation Army, and Habitat for Humanity ReStores regularly stock quality secondhand furniture at low prices, with proceeds often going to good causes.
Estate sales, flea markets, and yard sales are great for finding older, solid wood pieces that are no longer in production. You might also want to explore Buy Nothing groups in your community or scroll through apps like Nextdoor, where people often give away furniture when moving. It helps to check listings frequently, especially on weekends when people are decluttering. The key is to be patient, flexible, and ready to act quickly when something good comes up.
Top Spots to Search:
- Facebook Marketplace – Ideal for local finds and bargaining.
- Craigslist – Still a go-to for free or cheap furniture in your area.
- Thrift Stores – Goodwill, Habitat for Humanity ReStores, and local charity shops often have hidden gems.
- Estate Sales & Auctions – Great for higher-end vintage finds.
- Yard Sales & Garage Sales – Perfect for budget-friendly and unique pieces.
- Curb Alerts (Free Finds!) – Apps like Nextdoor or Buy Nothing groups often post giveaways—first come, first served!
Spotting Upcycling Potential
Some furniture looks rough on the outside but has excellent bones. Look for pieces made from solid wood—they’re sturdy, long-lasting, and easy to sand, stain, or paint. If a chair wobbles or a drawer sticks, don’t dismiss it. Many structural issues are easy fixes with wood glue, screws, or a little sanding. It’s often the shape and detailing of the furniture that determines its true potential.
Keep an eye out for dressers with dovetail joints, tables with carved legs, or chairs with mid-century curves. These features can shine with just a fresh coat of paint or new hardware. Avoid furniture with deep water damage, swollen MDF, or an overwhelming mildew smell, as these may not be worth the time and effort.
What to Look For:
- Solid wood construction – A good sign of durability and ease of refinishing.
- Sturdy structure – Wobbly legs or drawers can often be fixed, but avoid items with water damage or mold.
- Unique shape or detailing – Interesting lines, handles, or legs often look amazing with a little paint or polish.
- Unusual potential – Could a dresser become a bathroom vanity? Can an old ladder become shelving?
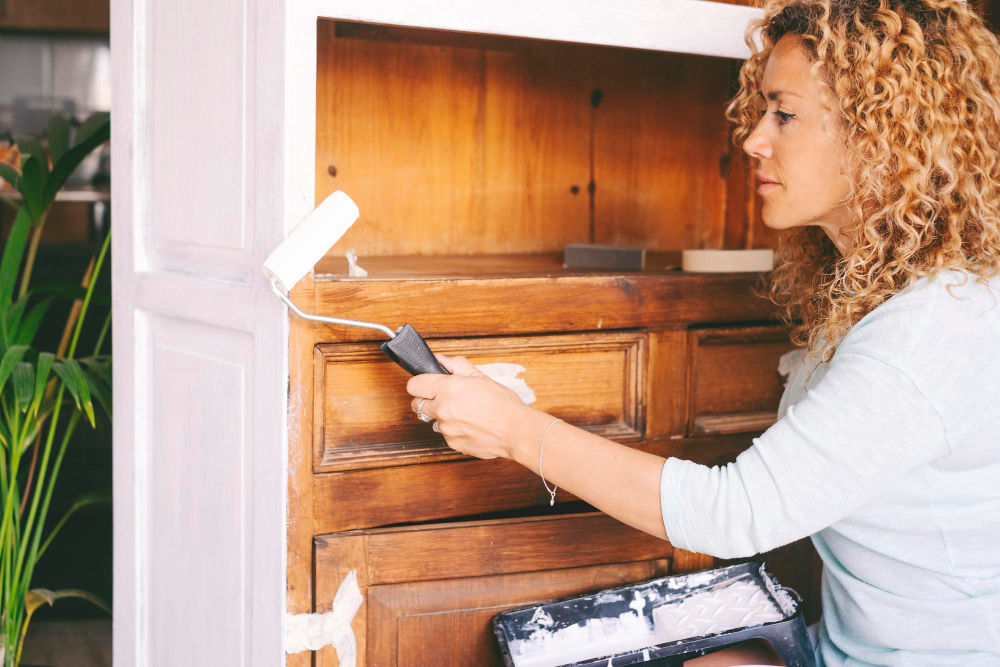
How to Clean and Prep for a Makeover
Before diving into your makeover, it’s essential to give your find a thorough clean and assessment. Start by vacuuming drawers and crevices to remove dust, cobwebs, or loose debris. A mix of warm water and gentle dish soap is usually enough for wiping down surfaces. For wooden items, you can follow up with a cleaner like Murphy Oil Soap or a diluted vinegar solution (equal parts water and vinegar) to lift grime.
Once clean, inspect the piece for loose joints, scratches, or missing hardware. Minor dings can be filled with wood filler and smoothed out with sandpaper. For painted or glossy surfaces, a quick sanding will help paint adhere better. If you’re planning to stain or re-finish wood, you may need to strip the old finish using a product like Citristrip and a scraper.
After prepping, your furniture is ready for its next chapter—whatever creative vision you have in mind.
Step-by-Step Cleaning Guide:
- Vacuum drawers and corners to remove dust and debris.
- Wipe down with warm, soapy water (use gentle dish soap) and a soft cloth.
- For wood, follow up with Murphy Oil Soap or vinegar + water (1:1 ratio) for deeper cleaning.
- Sand lightly to remove old varnish or gloss—especially if you’re planning to repaint.
- For musty odors, place a bowl of baking soda or activated charcoal inside drawers for a few days.
WARNING: Be careful with veneer or particleboard—these don’t hold up well to heavy sanding or moisture.
Quick Fixes and Handy Repairs
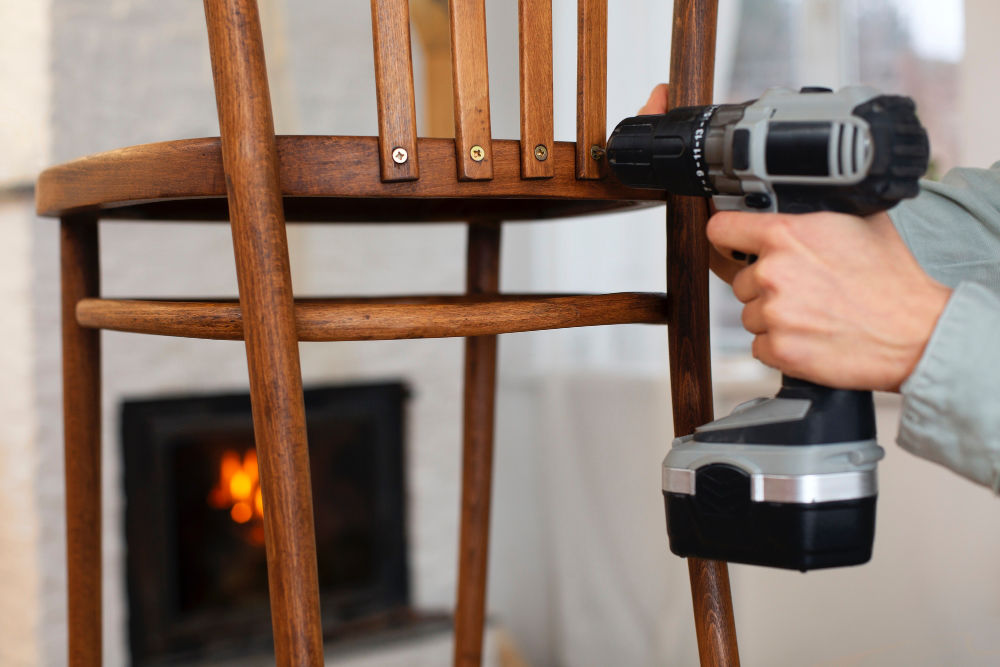
You don’t need to be a woodworking expert to tackle basic furniture repairs. Many common issues can be resolved with a few simple tools and a bit of patience. Loose joints in chairs or table legs can usually be fixed with wood glue and clamps—available affordably at any hardware store like Home Depot or Lowe’s. Sticking drawers? Rub a bar of dry soap or a candle along the runners for smoother movement.
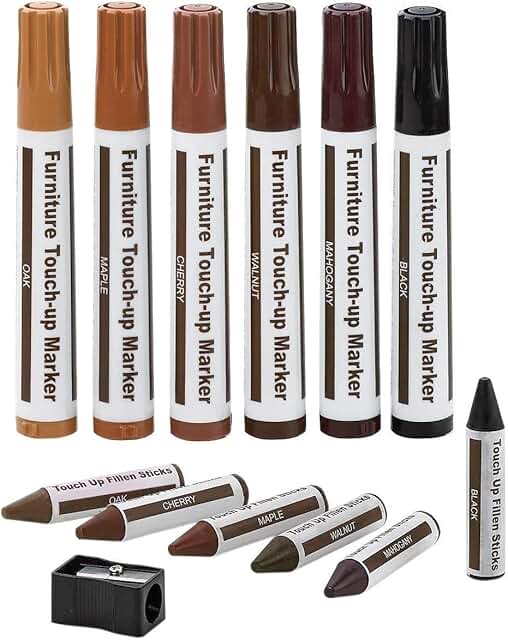
For missing or mismatched hardware, check stores like Home Depot, Lowe’s, or browse online retailers like Amazon or Wayfair. Replacing dated drawer pulls with sleek new knobs or vintage-style handles can completely change the personality of a piece. Scratched surfaces can be buffed out with fine steel wool and furniture polish or filled with a crayon or marker in a matching wood tone (look for “scratch cover kits” at Walmart or Target).
If something feels beyond your skill level, YouTube is your friend. There are thousands of step-by-step repair tutorials tailored to beginners—just search the problem you’re facing!
Quick Repairs:
- Loose legs or joints: Wood glue and clamps will do the trick.
- Missing hardware: Replace with modern knobs from Amazon, Target, or Anthropologie.
- Scratches & nicks: Try a walnut rubbed into the scratch, or wood filler + sandpaper.
- Sticky drawers: Rub a candle or bar of soap along the runners.
- Screws and Nails: for more drastic and structural repairs
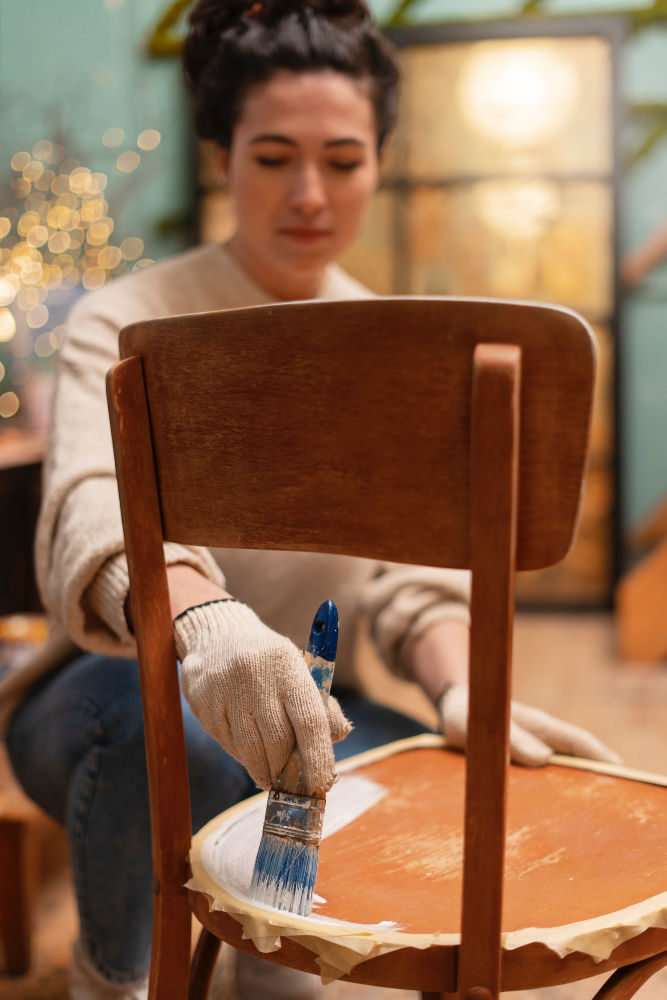
Transformative Makeover Ideas for Every Skill Level
Once your furniture is clean and sturdy, it’s time for the makeover! You can go as simple or as dramatic as you like, depending on your style and confidence level.
For beginners:
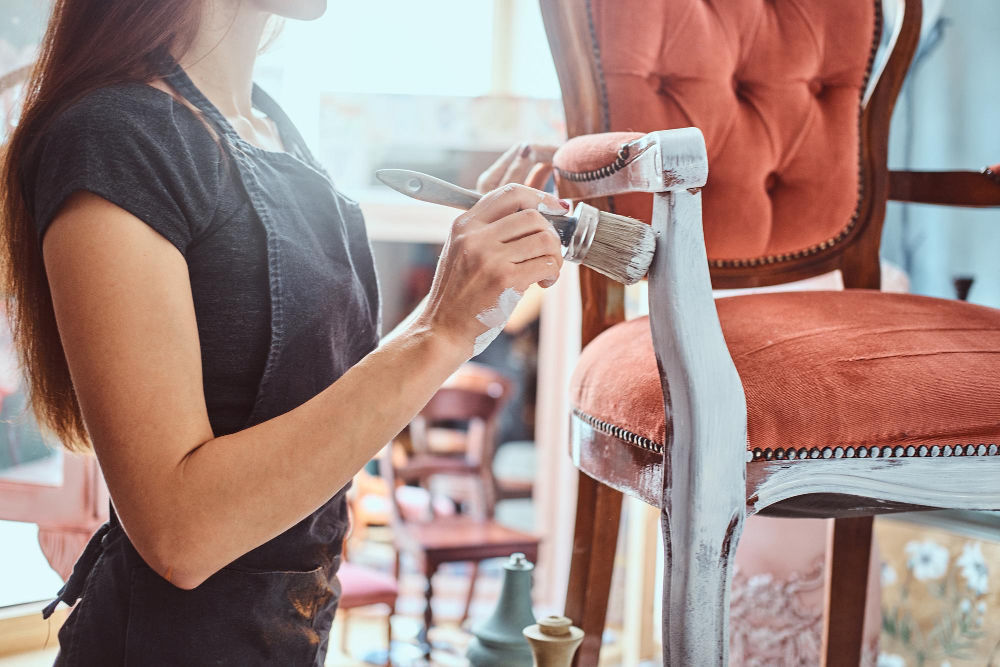
- Chalk paint is a great option—no sanding or priming needed, and it gives a matte, vintage look. Brands like Rust-Oleum Chalked or Annie Sloan are widely available.
- Spray paint can refresh metal hardware, chair frames, or side tables. Try metallic tones like brass, copper, or matte black.
- Add peel-and-stick wallpaper or contact paper inside drawers, on the back of bookcases, or across tabletops for a pop of color or pattern.
- For colours, try bold colours like navy, deep green or black for dramatic impact. Conversely, try Pastels and neutral colours like soft pinks, sage or grieve for a modern farmhouse vibe.
- You can also consider sealing with polycrylic for durability.
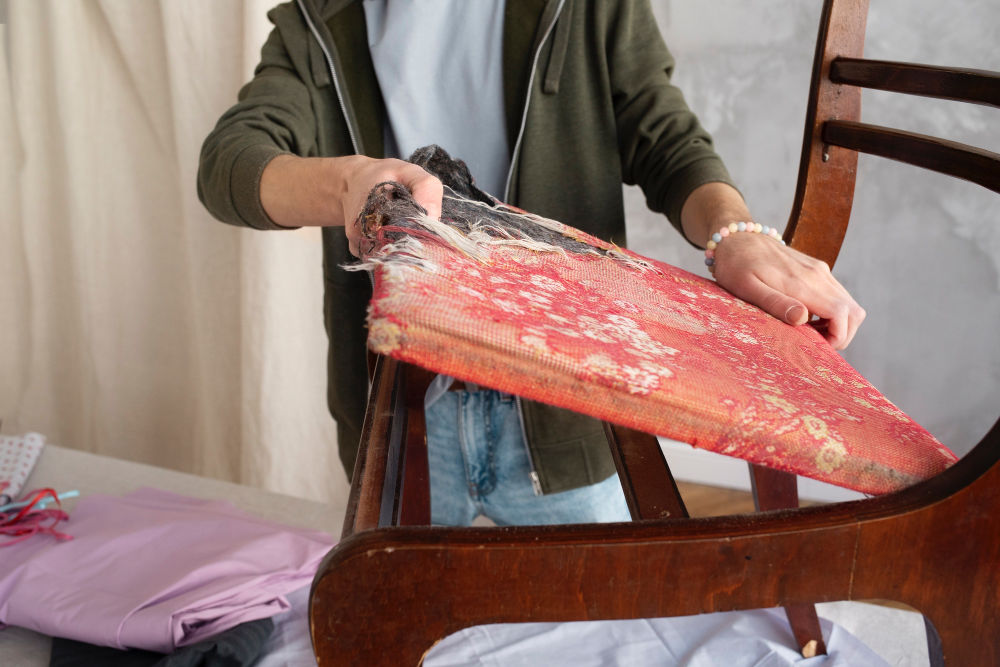
For intermediate DIYers:
- Try reupholstering a chair seat with a staple gun and upholstery fabric (available from Joann Fabrics or online).
- Replace or repaint drawer fronts in a two-tone style—e.g., white frame, colored drawers.
- Swap out table legs or drawer pulls for modern versions you can find at IKEA or specialty stores like Rejuvenation or Anthropologie.
For advanced upcyclers:
- Turn a dresser into a bathroom vanity.
- Convert an old TV cabinet into a pet station or bar cart.
- Repurpose doors or shutters into headboards or wall organisers.
Creative touches like gold leaf edges, stencilled designs, ombre paint, or even mosaic tiles can make your upcycle truly unique.
Style It and Show It Off
Once your upcycled piece is finished, styling it is the cherry on top. Think about where it will live and what vibe you want it to bring to the space. Use accessories, lighting, or surrounding décor to make it pop, examples below:
- A newly painted dresser can double as a bold entryway console—add a mirror and a vase for a polished look.
- A reupholstered accent chair becomes a focal point when paired with a cozy throw and side table.
- A painted bookshelf looks sharp when filled with color-coordinated books, baskets, or plants.
Don’t forget to document your transformation! Before-and-after photos are not only satisfying for you—they’re great for sharing on social media or in DIY communities like Reddit’s r/DIY or Facebook upcycling groups.
And if you catch the bug? Consider selling your revamped furniture on Etsy, Facebook Marketplace, or OfferUp. Many upcyclers turn their hobby into a side hustle. Read on to learn more.
Sustainable Style: Why Upcycling Matters
Upcycling isn’t just about saving money or flexing your creativity—it’s also a powerful way to reduce waste and embrace sustainable living. The U.S. throws away millions of tons of furniture every year, much of it still usable or repairable. By rescuing and reimagining old pieces, you’re helping to keep items out of landfills, reducing demand for mass-produced “fast furniture,” and cutting down on the environmental impact of manufacturing and shipping new goods.
Even small projects—like repainting a side table or updating an old stool—contribute to a larger movement of conscious, intentional living. And the best part? You end up with a home that reflects your personality, not a showroom catalog.
Turning Your Hobby into a Side Hustle
Once you’ve done a few successful upcycles, you may find yourself addicted—in the best way. Many DIYers turn their passion into profit by selling refurbished pieces locally or online. Platforms like Facebook Marketplace, OfferUp, eBay, and even Etsy are full of buyers looking for unique, handcrafted furniture with personality.
You can also document your process and build an audience on Instagram, Pinterest, or TikTok, where before-and-after flips are hugely popular. Share your tips, inspire others, and maybe even start taking commissions. Who knows? Your next hobby project could become the start of a small business.
Transform Your Space, One Piece at a Time
Upcycling old furniture isn’t just a trend—it’s a mindset. It’s about seeing the potential in what others overlook. Whether you’re turning a dusty dresser into a show-stopping sideboard or simply giving a tired coffee table a fresh coat of paint, every piece you revive brings new energy into your space and reduces your impact on the planet.
So don’t wait for the perfect piece—go find it! Head to your nearest thrift store, scroll through online listings, or take a walk around your neighborhood on trash day. The right piece is out there, just waiting for your creativity.
Start small. Dream big. And tag us @ColourMyLiving when you finish your next upcycle—we’d love to see your transformation!
What You Will Need – Best Tools & Supplies to Have On Hand
You don’t need a workshop to get started—just a few basics:
- Sandpaper or a sanding block
- Screwdriver & pliers
- Wood glue & clamps
- Paintbrushes or foam rollers
- Chalk or latex paint
- Protective finish (e.g., polycrylic)
- Staple gun (for upholstery)
- Rags, gloves, and painter’s tape